
How to Install Plasterboard: A Beginner’s Guide
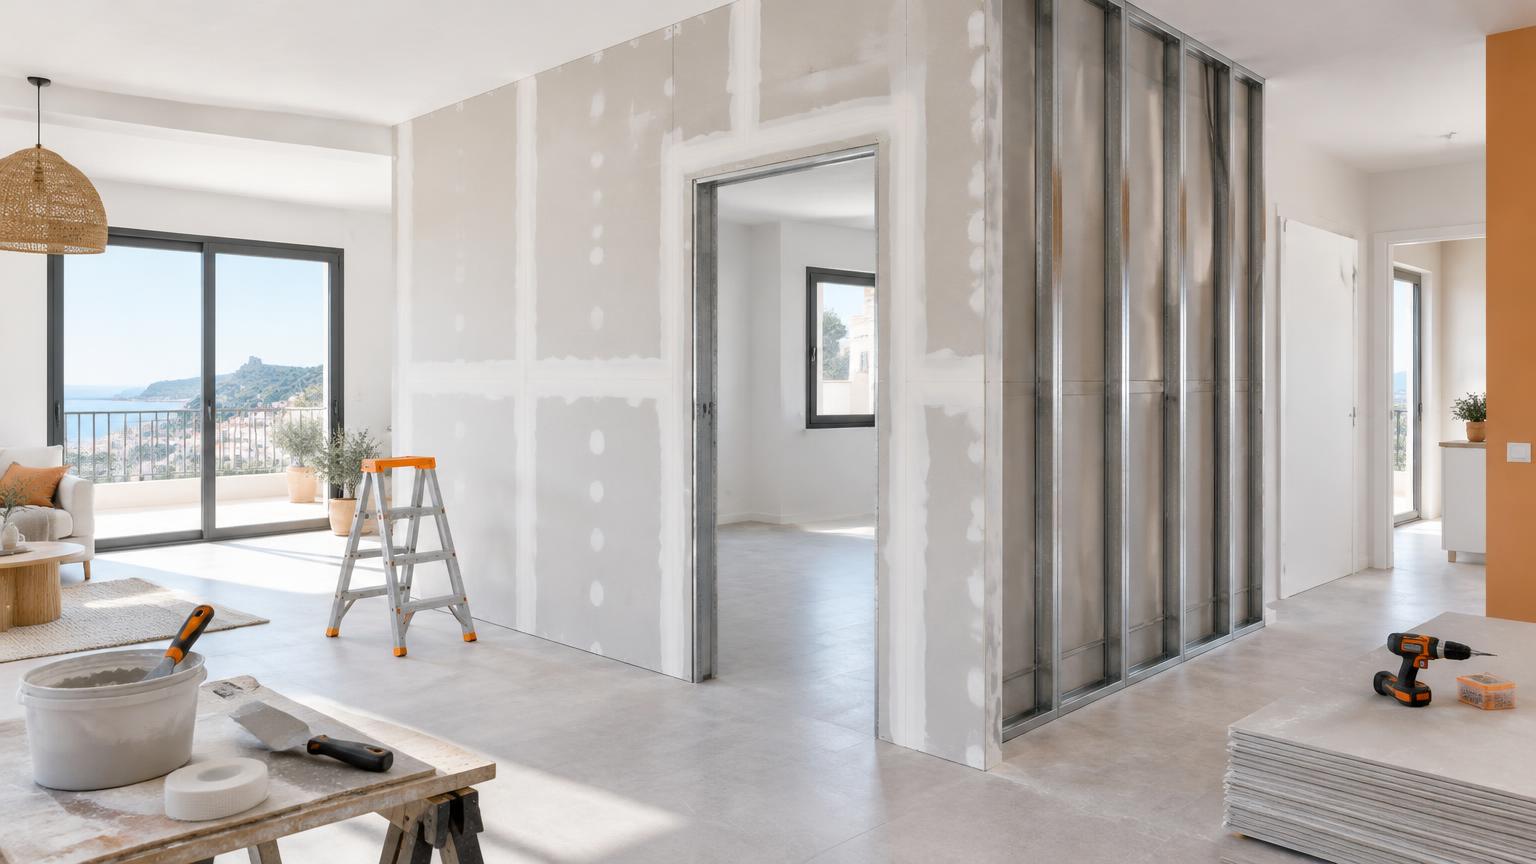
Installing plasterboard involves building a straight, secure frame, fitting suitable boards and finishing the joints carefully. The usual sequence is setting out, fixing the metal framing, incorporating insulation and services where needed, boarding and preparing for decoration. A small, non-load-bearing partition without doors or services is a sensible starting point for a beginner.
In Spain, plasterboard is often called pladur. This guide covers boards fixed to metal framing, rather than adhesive-fixed wall linings or suspended ceilings. Always follow the chosen manufacturer’s complete system: board thickness, stud spacing and fixings depend on the height, supporting surfaces and required performance. Moisture problems, overhead work and fire-rated construction deserve professional attention.
1. Choose the construction and check the room
A partition divides a room and normally has plasterboard on both sides of its frame. A wall lining covers an existing wall, using framing or, where suitable, a dedicated adhesive system. A suspended ceiling needs its own designed support arrangement; it is not simply a partition turned sideways.
Before ordering materials:
- Check that floors, walls and the ceiling are sound and dry.
- Investigate concealed pipes and wiring before drilling. A scanner helps but cannot rule out every hidden service.
- Decide whether the wall will carry cupboards, a television, radiators or sanitary fittings.
- Check whether the work needs local permission or an administrative submission.
In Costa del Sol properties, never board over damp without addressing its cause. Condensation, leaks and rising damp require different remedies. Establish where the frame can be anchored securely: an existing suspended ceiling is not automatically a suitable structural fixing point.
2. Gather materials, tools and indicative costs
Choose compatible components from a documented manufacturer’s system. The basic list includes boards, metal tracks and studs, perimeter sealing or isolation strip, suitable substrate anchors, plasterboard-to-metal screws, joint tape and compatible jointing compound. Include mineral wool and load-bearing reinforcement where specified.
Standard boards suit dry rooms. Areas exposed to humidity may need moisture-resistant boards, but these are not waterproof. Shower areas and other wet surfaces also need the appropriate waterproofing and finish.
Useful tools include:
- Tape measure, pencil, straightedge and a long spirit level or laser.
- Utility knife, board rasp and metal snips.
- Drill, depth-controlled screw gun and jointing knives.
- Sanding block, dust extraction, goggles, gloves and suitable respiratory protection.
As a broad guide, materials for a basic partition may cost €20–€40/m², while professional supply and installation may be around €40–€80/m². Costs vary with specification, existing condition and location. Decoration, doors, services and small-job overheads can change the total substantially. Ask how the area is measured and whether tax is included.
3. Set out and install the metal frame
- Mark the partition position on the floor, allowing for its full finished thickness rather than just the metal track.
- Transfer the lines to the adjoining walls and ceiling. Check alignment, verticality and squareness before drilling.
- Fit the specified sealing or isolation strip beneath the perimeter profiles.
- Secure the tracks using anchors appropriate to each supporting material and the manufacturer’s fixing intervals.
- Position the studs to suit the board dimensions and the selected construction.
Stud centres of 400 or 600 mm are common, but they are not interchangeable choices. Wall height, board layers, loads and finishes determine the spacing. A tiled finish, for instance, may require a stiffer construction.
Trade tip: mark stud positions outside the board area so you can locate them when fixing the sheets. Follow the system details for stud ends, connections and allowances for movement rather than improvising. Door openings need correctly formed jambs and a head detail; simply leaving a gap between ordinary studs is not enough.
4. Plan insulation, services and reinforcement
Resolve everything inside the wall before closing it. Depending on the specified sequence, you can board one side first, then install insulation and services before fitting the opposite face.
- Cut mineral wool to fit without gaps or excessive compression.
- Install compatible reinforcement where substantial loads will be attached.
- Route cables through designated openings and protect them from sharp metal edges.
- Photograph the open frame with measurement references for future fixing work.
Sound insulation depends on the whole assembly, including boards, cavity, mineral wool, seals and junctions. Adding mineral wool alone does not guarantee effective soundproofing. Unsealed openings and back-to-back electrical boxes can undermine performance.
Before any electrical intervention, switch off the supply at the consumer unit and verify that it is dead with a suitable voltage detector. In Spain, new electrical installations and extensions require an authorised installer and the relevant installation certificate, commonly called a boletín, under the REBT. Do not attempt DIY gas work: use an appropriately authorised professional.
5. Cut and screw the boards into place
Have someone help with full-size sheets: they are awkward to handle and can snap if allowed to bend. Store boards flat, properly supported and protected from moisture.
- Measure the required piece and mark the cut using a straightedge.
- Score the paper on one face with a utility knife, carefully snap the core and cut through the backing paper.
- Smooth the cut edge and prepare it as required by the jointing system.
- Position the sheet with the specified perimeter clearances, keeping it away from damp floor surfaces.
- Fix it to the framing using the screw length and spacing specified for that board build-up.
Screw heads should sit slightly below the surface without tearing the paper. If a head breaks through, add a correctly seated fixing nearby, while maintaining the required edge distances.
Board edges must have the support required by the system. Avoid four corners meeting at one point, and stagger joints between faces and layers where specified. Around door openings, follow the recommended board layout rather than placing joints at stress-prone corners. Screws cannot correct a badly cut or poorly supported sheet.
6. Tape the joints and prepare for painting
Finishing often takes more patience than assembling the frame. Use the tape and compound combination specified for the boards: different tape types do not necessarily use the same application method.
- Remove dust and inspect screws, board edges and surface damage.
- Prefill gaps where required with the appropriate product.
- Apply the jointing compound and tape as instructed, avoiding trapped air and wrinkles.
- Apply further, progressively wider coats when the product is ready for recoating.
- Cover screw heads and fit the specified corner beads.
- Allow to dry, sand lightly, remove dust and prime before painting.
Follow the product’s drying and recoating instructions. Humidity, ventilation and temperature all affect progress. One thick coat is not a shortcut for several controlled applications, and aggressive sanding can damage the board paper.
Check the finish under light shining across the surface. Satin paint or strong side lighting may call for a higher finish standard across the whole wall. Do not rigidly fill movement joints or special perimeter junctions where the construction detail requires a different treatment.
7. When to bring in a professional
Seek professional help for suspended ceilings, tall partitions, pocket doors, heavy wall-mounted fittings, persistent damp or assemblies with specified acoustic or fire performance. The same applies if you cannot identify safe fixing points or need existing services altered.
When comparing quotations, ask for:
- Board type, thickness and number of layers on each face.
- Framing, insulation, reinforcement and measured area.
- Joint finish, decoration and waste removal.
- Services, taxes and exclusions.
A square-metre rate without this information does not allow a fair comparison. On a small job, travel and repeat visits for joint finishing can account for a significant part of the cost. State whether you want the surface ready for decorating or fully painted.
If your property is on the Costa del Sol, ReformaClick helps you find renovation companies and request quotes without obligation. Provide dimensions, photographs and details of how the space will be used so contractors can assess the work more accurately.
Frequently asked questions
Can plasterboard be fitted directly to an existing wall?
Yes, a dedicated adhesive-fixed lining system may be suitable if the wall is sound, dry and compatible. It is not a way to conceal damp, and its preparation and installation requirements differ from those for a framed partition.
What thickness of plasterboard should I use for a partition?
Boards of 12.5 or 15 mm are common, but thickness is only one part of the specification. Wall height, framing, number of layers, loads and performance requirements determine the complete construction.
Can I hang kitchen cupboards on a plasterboard wall?
Yes, provided the wall and its fixing arrangement are designed for the loads. Plan reinforcement before boarding wherever possible. Do not select fixings solely by their advertised weight rating: board type, backing, fixing layout and the cupboard’s leverage all matter.
How long does plasterboard jointing compound take to dry?
It depends on the product, coat thickness and site conditions. Setting time and drying time are not the same: a compound that feels hard may not be ready for paint. Check the technical instructions before recoating, sanding or decorating.
Would you rather hire a professional?
Tell us about your project and we will connect you with renovation companies on the Costa del Sol. No obligation.
Get a quote