
Plasterboard Joints: How to Get a Smooth Finish
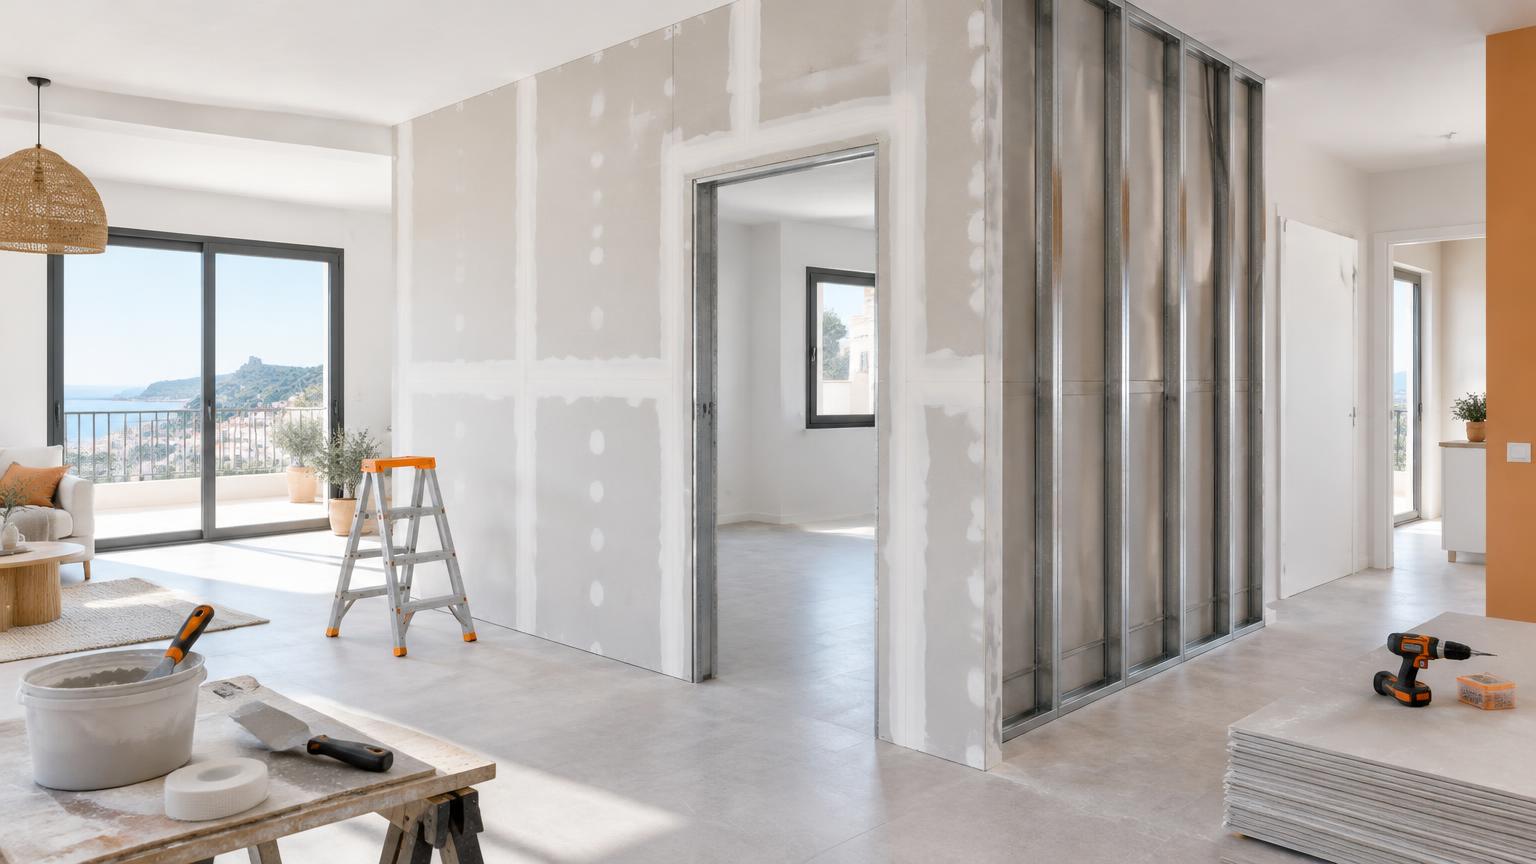
To finish plasterboard joints, you need compatible jointing compound, joint tape and several thin coats, allowing each application to dry properly. A smooth result comes from bedding the tape securely and gradually widening the finish, rather than sanding aggressively at the end.
A small repair or an accessible wall can be a manageable DIY project, provided the boards are dry, secure and correctly installed. This guide covers preparation, tools and technique, plus the warning signs that suggest you should bring in a professional.
1. Check the boards before starting
Jointing compound cannot stabilise a moving wall. Check that the plasterboard is firmly fixed, dry and free from damaged edges. Screw heads should sit just below the surface without tearing through the paper face. Correct proud screws; where a head has broken through the paper, check the fixing against the system instructions.
Identify the joints you are dealing with. Factory-tapered edges provide a shallow recess for tape and compound. Butt joints between square or cut ends have no such recess, so you will need a wider feathered finish to disguise the slight build-up.
- Remove dust, loose paper and building debris.
- Inspect corners, ceiling junctions and connections to other materials.
- Look for leaks, condensation or signs of recurring movement.
Do not cover damp boards or recurring cracks without addressing the cause. In Costa del Sol properties left closed for extended periods, check ventilation and moisture conditions before beginning cosmetic repairs.
2. Choose compatible materials and tools
Use jointing products that are compatible with each other and with the installed plasterboard system. General-purpose hole filler is not automatically suitable for bedding tape or finishing long joints.
Prepare the following:
- Jointing compound suitable for taping and finishing, or separate products where specified.
- Paper joint tape, or another tape expressly approved for the system.
- A narrow filling knife, a wide jointing knife or trowel, and a clean compound tray.
- A low-speed mixer if using powdered compound.
- A sanding block or dust-extracting sander, with fine abrasive, typically 180–220 grit for finishing.
- Suitable plasterboard primer, a portable work light and floor protection.
- Safety glasses and suitable fine-dust respiratory protection, such as a properly fitted FFP2 mask.
Ready-mixed compounds are convenient but rely on evaporation to dry. Setting compounds harden chemically and have a limited working time. Set does not necessarily mean dry enough to paint. Never add water to revive a batch that has started to harden.
3. Prepare the joint and bed the tape
Keep tools and mixing containers clean: small lumps of hardened compound can drag grooves through fresh material. For powdered products, follow the manufacturer's water ratio, mixing method and standing time.
- Clean the joint and prepare cut edges as specified for the system. Do not carve deep bevels into every edge.
- Pre-fill gaps and damaged areas with the appropriate product. If a gap exceeds the system's permitted limits, correct the boarding rather than packing it with excessive compound.
- Spread a continuous bed of taping compound slightly wider than the tape.
- Centre the tape over the joint and press it into the compound, working from the middle towards the ends.
- Remove excess material without squeezing out the entire bedding layer, then apply a thin covering coat as directed for the product.
The tape should lie flat without bubbles or folds. Do not wet paper tape unless its manufacturer instructs you to. Self-adhesive mesh is not a shortcut that works with every filler: some combinations require a specified setting compound.
4. Build thin coats and finish corners and fixings
Once the previous application is sufficiently dry according to the product instructions, scrape off small ridges and apply the next coat. A typical sequence involves taping, filling and finishing, although the actual number of applications depends on the system and required finish.
Make each coat wider than the one beneath it, feathering the edges and avoiding a heavy ridge in the centre. Butt joints need a particularly broad transition. Adding a thick strip directly over the seam only makes the joint more noticeable.
- Internal corners: fold paper tape along its centre crease and bed it into both faces. Finishing one side before the other can help avoid disturbing wet compound.
- External corners: use a compatible corner bead, aligned and secured as specified by the system.
- Screw heads: cover with thin applications and repeat where drying leaves a slight hollow.
- Junctions with other materials: follow the designed detail; do not bridge movement joints with tape and compound.
A useful trade tip is to place a wide knife across the joint to check its profile before applying more material.
5. Allow drying time, then sand and prime
Drying depends on coat thickness, temperature, ventilation and humidity. As a rough guide, some drying-type compounds need around 12–24 hours between coats, and longer in damp conditions. Always follow the technical information and check the actual material rather than relying on the clock.
Provide gentle ventilation. Do not aim a heater at the wall to dry only the surface, and stay within the manufacturer's application conditions.
- Shine a work light along the surface to reveal ridges and tool marks.
- Sand lightly once the compound is dry, preferably using dust extraction.
- Avoid scuffing the plasterboard paper or exposing the tape.
- Remove sanding dust and apply a compatible primer to even out suction.
- Inspect again before decorating. Repair remaining defects and re-prime those areas as required.
Paint will not hide a raised joint. Strong side lighting, including sunlight from large terrace doors, can make minor irregularities obvious. For demanding lighting or satin finishes, a thin full-surface finishing treatment may be needed rather than joint treatment alone.
6. Common problems and indicative costs
Different defects need different repairs:
- Tape bubbles: these usually indicate poor adhesion underneath. Remove the affected section and re-tape it; another surface coat will not fill the void reliably.
- Cracks that return: investigate movement, inadequate fixings or unsuitable junction details before repairing.
- Raised seams: reduce excess material where appropriate and widen the feathered transition rather than adding more to the centre.
- Visible patches after painting: check both surface profile and suction. Missing primer can leave differences even where the joint feels smooth.
For a small DIY job, allow roughly €25–€70 for consumables and €20–€60 for additional basic hand tools. A small professional joint repair and finishing job might fall around €150–€450, although travel and return visits for drying can account for much of the cost.
These are indicative ranges and vary with material quality, existing condition and location. Ask whether quotes include protection, preparation, the agreed finish, primer, painting and VAT.
7. When to call a professional
Get professional advice for repeated cracking, loose boards, dampness, high ceilings or large areas exposed to strong side lighting. Specialist input is also sensible where the partition has acoustic or fire-resistance requirements: the joint treatment must remain compatible with the complete system.
If electrical fittings are involved and you need to work beside them, switch off the relevant supply at the consumer unit and verify that it is dead using a suitable voltage detector. In Spain, new electrical installations and extensions require an authorised installer and the relevant installation certificate, commonly called a boletín, under the REBT. Never attempt DIY work on gas installations.
A contractor can establish whether re-taping is enough or whether the boards and supporting structure need attention first. If your property is on the Costa del Sol, ReformaClick can help you find renovation companies and request quotes without obligation, so you can compare the proposed scope of work.
Frequently asked questions
Can you fill plasterboard joints without tape?
In conventional systems, tape is part of the joint treatment and helps resist cracking. Omit it only where the manufacturer specifically approves a tape-free method for the particular board, edge and compound combination.
How many coats do plasterboard joints need?
Taping, filling and finishing are a common sequence. The exact number depends on the compound, joint type and finish required. An additional thin coat is generally better than trying to do everything with one heavy application.
Is paper tape better than mesh tape?
Paper tape is widely used for flat joints and internal corners. Mesh can suit approved systems, but it must be paired with the correct compound. Check the manufacturer's instructions rather than treating the two as interchangeable.
Why can I see plasterboard joints after painting?
The joint may be raised, insufficiently feathered or absorbing paint differently from the surrounding board. Side lighting and satin paint highlight these issues. Depending on the cause, you may need levelling, primer or a full-surface finishing treatment.
How soon can I paint after jointing plasterboard?
Wait until the compound is fully dry, sanded, dust-free and primed, then respect the primer's drying instructions. Elapsed time alone is not a reliable test: coat thickness and humidity can significantly extend the wait.
Would you rather hire a professional?
Tell us about your project and we will connect you with renovation companies on the Costa del Sol. No obligation.
Get a quote